Main Menu>Master Data Management>Inventory>Warehouse master
Here you enter the name of Warehouse.

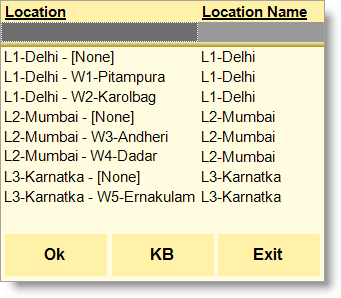
Image Summary: Warehouse "W1-Pitampura" has been associated with location "L1-Delhi".
Fields in the Warehouse Master:
Warehouse name |
Enter the Item of the Warehouse. This name will appear in the selection list of Warehouse. |
||||||||||
Print Name |
Enter the name that you like to print in the reports. You may enter a short abbreviated name to reduce space or full name as desired. |
||||||||||
Location(s) |
Press ALT + L to select one or more location from the list. Selected Location(s) will be associated with the Warehouse, so that at the time of Stock Transfer Indent or Stock Transfer entries it will show the Warehouse with the associated Location(s) only.
For example: We have three locations and five warehouses. Two location(s) are associated with two warehouses in each and one location with one Warehouse as shown in the table below:
Now if you create these five Warehouses and associate respective Location with them as shown in the table above, then following list will show at the time of location select during Stock Transfer Indent or Stock Transfer entries.  Note: •[None] Warehouse will show with every Location since it is default. •A warehouse can be associated with one or more locations. |
Buttons in the Warehouse Master:
Buttons in the Warehouse Master are as follows:

Warehouse Master Display Screen:
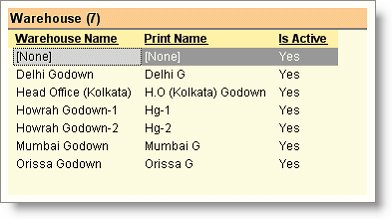
Display Screen are as follows:
