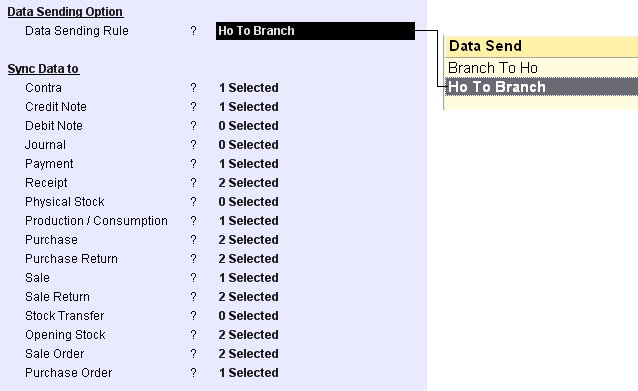
When you set Yes at Data Sending Rule field in the Location Master Entry screen, you get the following screen to specify the Data Sending Options

Data Sending Option Data Sending Rule |
Enter the name of the data sending rule (e.g HO to Mumbai). |
Sync Data to |
Press enter to select locations to which data would be transferred. Now press <enter> at the respective voucher types shown below to get a screen to select locations to which data would be transferred. For example, Mumbai Branch may select (HO) and Cal Branch to transfer data for Sock Transfer Voucher, while it may select only HO for Purchase Voucher. This way selects the transferee location for each voucher type. The number of locations (including the own location) for which you select data transfer would be displayed. |
Contra |
1 Selected |
Credit Note |
1 Selected |
Debit Note |
0 Selected |
Journal |
0 Selected |
Payment |
0 Selected |
Receipt |
0 Selected |
Physical Stock |
0 Selected |
Production/Consumption |
0 Selected |
Purchase |
1 Selected |
Purchase Return |
0 Selected |
Sale |
2 Selected |
Sale Return |
0 Selected |
Stock Transfer |
3 Selected |
Opening Stock |
0 Selected |
Sale Order |
0 Selected |
Purchase Order |
0 Selected |
Require to change Time Interval duration in Location master
Scenario:
In Location Master (M>I>L), at present duration of Time Interval for Data to sync is 5 minutes by default and we are not allowing to input below 5 min. But in case of call centre, a lower input is required.
Solution:
Now we will allow to change the Time Interval up to 1 min